 My new farm-fresh 2005 Chevy Silverado has got 130k miles and is in need of some coolant system TLC. I decided to go ahead and do a coolant flush. After some online reading, I found that about 2 gallons of fluid is recovered after draining (which then also needs to be replenished). This formed the basis for my purchases. I got 6 gallons of distilled water, 2 gallons of Dexcool (1 extra gallon pictured for other use), 1 qt Prestone flush and a new thermostat. I also picked-up an antifreeze tester to ensure I’ve done it right.

Step 1: Drain the coolant. This is done by removing the lower coolant hose from the radiator (passenger side). The stock clamp is a pain to work with, but doable with some channel locks. I had a large plastic container ready to catch whatever flowed down.
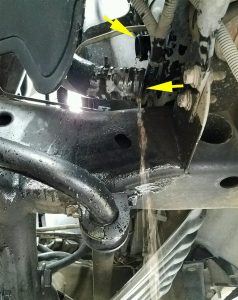 Be warned, this can all be quite messy. Once the gushing turned to a trickle, I then removed the thermostat and housing using a 10mm socket to remove two bolts holding it on. As I did this, a bunch more coolant started to leak out and once again gushed upon removing the thermostat. At this point, all the coolant I can remove has leaked out. Onwards…

 This simply shows after having removed the thermostat and housing. Notice the black gasket material still stuck to the manifold… this will need to be cleaned off before installing the new thermostat (to be done last).
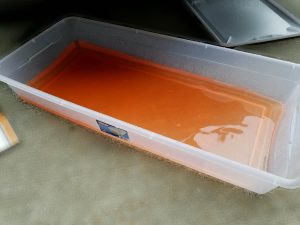 The fruits of my labor thus far. About two gallons worth of fluids. The color is actually not too bad, but we did recently add about 1/2 gallon of Dexcool and fresh water due to the coolant being so low (due to some other undiagnosed leak… to be tackled later).
 I left the thermostat connected to the lower coolant hose. The goal here is to leave the housing connected, but remove just the thermostat. This will allow the coolant to flow through the entire system the moment the engine is running, rather than having to wait 10+ minutes for the fluids to get up to temperature. The thermostat will remain out of the system until I’m ready to do the final fill.
 Here’s a clear view of the thermostat. It can be removed simply by pulling it out. It took almost no effort at all.
 Once the thermostat is out, I carefully removed the rubber gasket at its base, then inserted it back into the thermostat housing. Without the gasket going back on, it would leak.
 Here is the gasket installed back into the housing, all ready to go.
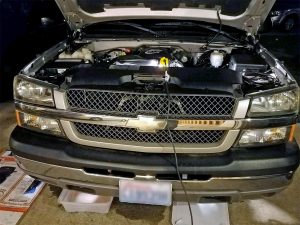
 The next step was to hook everything back up and pour the Prestone flush solution into the overflow container, then filling the system using two entire gallons of distilled water. You can use tap water at this point, but our water is so hard here, plus I was buying distilled water anyway, I just got a couple extra gallons and avoided tap water all together. Next, with the overflow cap still off, I started the engine and ensured the system was topped-off, then put the cap back on and ran the engine for 20 minutes. While I was waiting, I poured the first two gallons of drained coolant into the two now empty gallon jugs for proper disposal.
 After about 20 minutes, my temp gauge showed the engine hadn’t even gotten up to the normal operational temp (just below 210). But, this is normal and not an issue.
 I then drained the system again, refilled it with two more gallons of distilled water plus a bit more from a 3rd gallon, then ran the engine for another 20 minutes. At this point it was getting later and the sun had already set, temperature was dropping. Out came my work light. Oh, and it was beginning to rain. Yay.
The water was drained out, completing the last drain for this flush. I removed the thermostat housing again and removed the housing from the hose this time. New thermostat+housing installed. Everything put back together and I poured in two gallons of Dexcool (yes, you want a 50-70% Dexcool-to-water ratio, but with all the undrainable water in the system, at least 2 gallons worth, I would end up with the desired ratio). The engine was started and I topped it off with some of the remaining distilled water.
Done!
 The next day I tested the coolant with the antifreeze tester I got. All looks good! The yellow arrow points to the indicated measurement.
Now to track down that coolant leak… (I would have done that first, but below-freezing temps are upon us).
I noticed the expansion tank wasn’t circulating coolant when the thermostat was out unless I revved it to 3000+ rpm.
I ended up doing what you wrote, but ended up putting the thermostat back in because it started the circulation in the tank faster and better. I didn’t really mind waiting 5-10 mins for the coolant to get to temp.